Difference between revisions of "BOLDscreen"
From SpinozaWiki
(→Setting correct screen layout, resolution and refresh rate on 3T) |
(→Setting correct screen layout, resolution and refresh rate on 3T) |
||
| Line 36: | Line 36: | ||
select “Make primary” if not. | select “Make primary” if not. | ||
| − | [[Image:boldscreen_troubleshooting_02.jpg|thumb|200px|NVIDIA control panel]] | + | [[Image:boldscreen_troubleshooting_02.jpg|center|thumb|200px|NVIDIA control panel]] |
# Under “Change resolution”, make sure | # Under “Change resolution”, make sure | ||
| Line 47: | Line 47: | ||
keep these changes?”. Close the window by clicking X in the top-right corner. | keep these changes?”. Close the window by clicking X in the top-right corner. | ||
| − | [[Image:boldscreen_troubleshooting_03.jpg|thumb|200px|NVIDIA control panel]] | + | [[Image:boldscreen_troubleshooting_03.jpg|center|thumb|200px|NVIDIA control panel]] |
# Close NVIDIA control Panel and open “Screen resolution” (right-click in the desktop) | # Close NVIDIA control Panel and open “Screen resolution” (right-click in the desktop) | ||
| − | [[Image:boldscreen_troubleshooting_04.jpg|thumb|200px|Select screen resolution control panel]] | + | [[Image:boldscreen_troubleshooting_04.jpg|center|thumb|200px|Select screen resolution control panel]] |
# Select display 1 and click “Advanced settings” | # Select display 1 and click “Advanced settings” | ||
| − | [[Image:boldscreen_troubleshooting_05.jpg|thumb|200px|Screen resolution control panel]] | + | [[Image:boldscreen_troubleshooting_05.jpg|center|thumb|200px|Screen resolution control panel]] |
# Next, go to the tab “Monitor” | # Next, go to the tab “Monitor” | ||
| − | [[Image:boldscreen_troubleshooting_06.jpg|thumb|200px|Tab monitor control panel]] | + | [[Image:boldscreen_troubleshooting_06.jpg|center|thumb|200px|Tab monitor control panel]] |
# Make sure “Screen refresh rate” is set to 120Hz and select OK. Close the window by clicking X in the top-right corner. | # Make sure “Screen refresh rate” is set to 120Hz and select OK. Close the window by clicking X in the top-right corner. | ||
| − | [[Image:boldscreen_troubleshooting_07.jpg|thumb|200px|Tab monitor control panel]] | + | [[Image:boldscreen_troubleshooting_07.jpg|center|thumb|200px|Tab monitor control panel]] |
# Do the same for the cloned displays 2|3 (go through steps 5 to 7). | # Do the same for the cloned displays 2|3 (go through steps 5 to 7). | ||
Revision as of 08:54, 31 May 2019
For stimulus presentation, we use 32" BOLD screen from Cambridge Research Systems at 3T, 7T as well as the mock scanner.
Most important specifications:
- Size: 32 inch
- Resolution: 1920 x 1080
- Refresh Rate: 100 or 120 Hz
3T
- Distance eye to mirror = ~10cm
- Distance mirror to screen = ~148cm
- Total distance ~158cm
7T
- Distance eye to mirror = ~5cm
- Distance mirror to screen = ~205cm
- Total distance ~210cm
Troubleshooting
Screen does not show any image
If the screen does not show any image (also not the test screen) when powering up, check the LED at the back (pinhole). Green indicates nominal function, red malfunction. If red, reseating the SD and power-cycling the screen may resolve the issue.
Setting correct screen layout, resolution and refresh rate on 3T
For pdf version of the instructions on Setting the correct screen layout, resolution and refresh rate on the 3T-stimulus computer, see: Editting screen properties of the stimulus computer
Setting the correct screen layout, resolution and refresh rate on the 3T-stimulus, v1.0
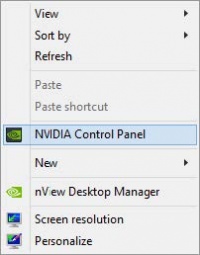
- In case of problems, first open “NVIDIA control panel” (right-click in the desktop)
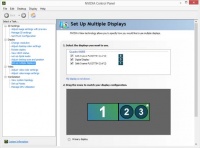
- Under “Set up multiple displays”, make sure
- displays 1, 2 and 3 are ticked
- 1 is on the left (drag it to the left if not)
- 2 and 3 are cloned (right click on 3 and select “Clone with 2” if not)
- 2 | 3 are set as primary (as indicated by * in the right top corner, right click on 2|3 and
select “Make primary” if not.
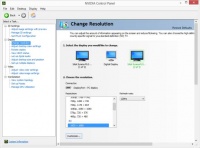
- Under “Change resolution”, make sure
- . all three displays are set to PC, 1920 x 1080 (you can select one by left-clicking on the
display)
- all three displays are set to a refresh rate of 120Hz. If one display is set to another refresh
rate, move on to step 4 after step 3c to change it to the correct rate. Otherwise, you are set for a three-monitor setup after step 3c.
- If you made any changes, select “Apply” and answer “Yes” when asked “Would you like to
keep these changes?”. Close the window by clicking X in the top-right corner.
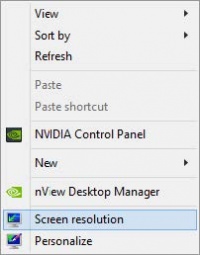
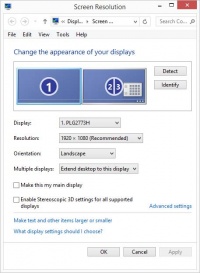
- Close NVIDIA control Panel and open “Screen resolution” (right-click in the desktop)
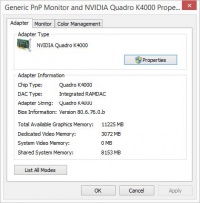
- Select display 1 and click “Advanced settings”
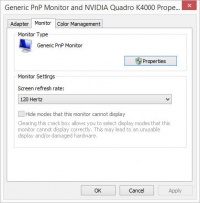
- Next, go to the tab “Monitor”
- Make sure “Screen refresh rate” is set to 120Hz and select OK. Close the window by clicking X in the top-right corner.
- Do the same for the cloned displays 2|3 (go through steps 5 to 7).
- You are set for a three-monitor setup after step 10. If you require a two-monitor setup (because
your task is not programmed to set up the displays correctly), untick display 1 in step 2. After completing your experiment, please enable display one and go through the steps above.
- Close all windows by clicking X in the top-right corner.
